Smart Door Lock Installation Guide: Avoid Costly DIY Mistakes
This smart door lock installation guide is for anyone staring at a boxed lock, a front door, and that slightly anxious thought: “What if I install this wrong and lock myself out?” I’ve installed a few smart locks over the years, and most problems had nothing to do with the lock itself. They came from skipped measurements, rushed alignment, or assuming every deadbolt opening is “standard” when it really isn’t. The guide rewards the kind of patience most people skip when the box already feels heavy in their hands.
If you do the prep first, most installs take 45 to 120 minutes. That includes both retrofit smart lock installation models that keep your existing exterior deadbolt and full replacement locks with keypad or fingerprint hardware. Success is simple: the bolt should slide smoothly, the thumb turn should feel easy, the app should pair without drama, and the motor should lock and unlock without grinding or hesitation. A few extra minutes on prep shaves an hour off the troubleshooting later.
The big pitfalls are predictable: wrong backset, poor door alignment, pinched cables, overtightened screws, and app pairing friction. Get those under control and this project is very doable for a homeowner or renter with basic tools. It asks for patience with the app pairing step more than the hardware work.
Quick Summary
- Direct answer: check compatibility first, remove the old deadbolt, install the new latch and assemblies, calibrate, pair the app, then test every unlock method.
- Most doors work if thickness is around 1-3/8″ to 2″ and backset is 2-3/8″ or 2-3/4″.
- Retrofit locks are easier because they keep the existing exterior hardware and usually need fewer adjustments.
- DIY works best on standard wood doors that already close cleanly and have a properly aligned deadbolt.
- Stop and reconsider if your door sticks, the frame is misaligned, or you have a metal door with unusual prep.
How to install a smart door lock without making the usual mistakes
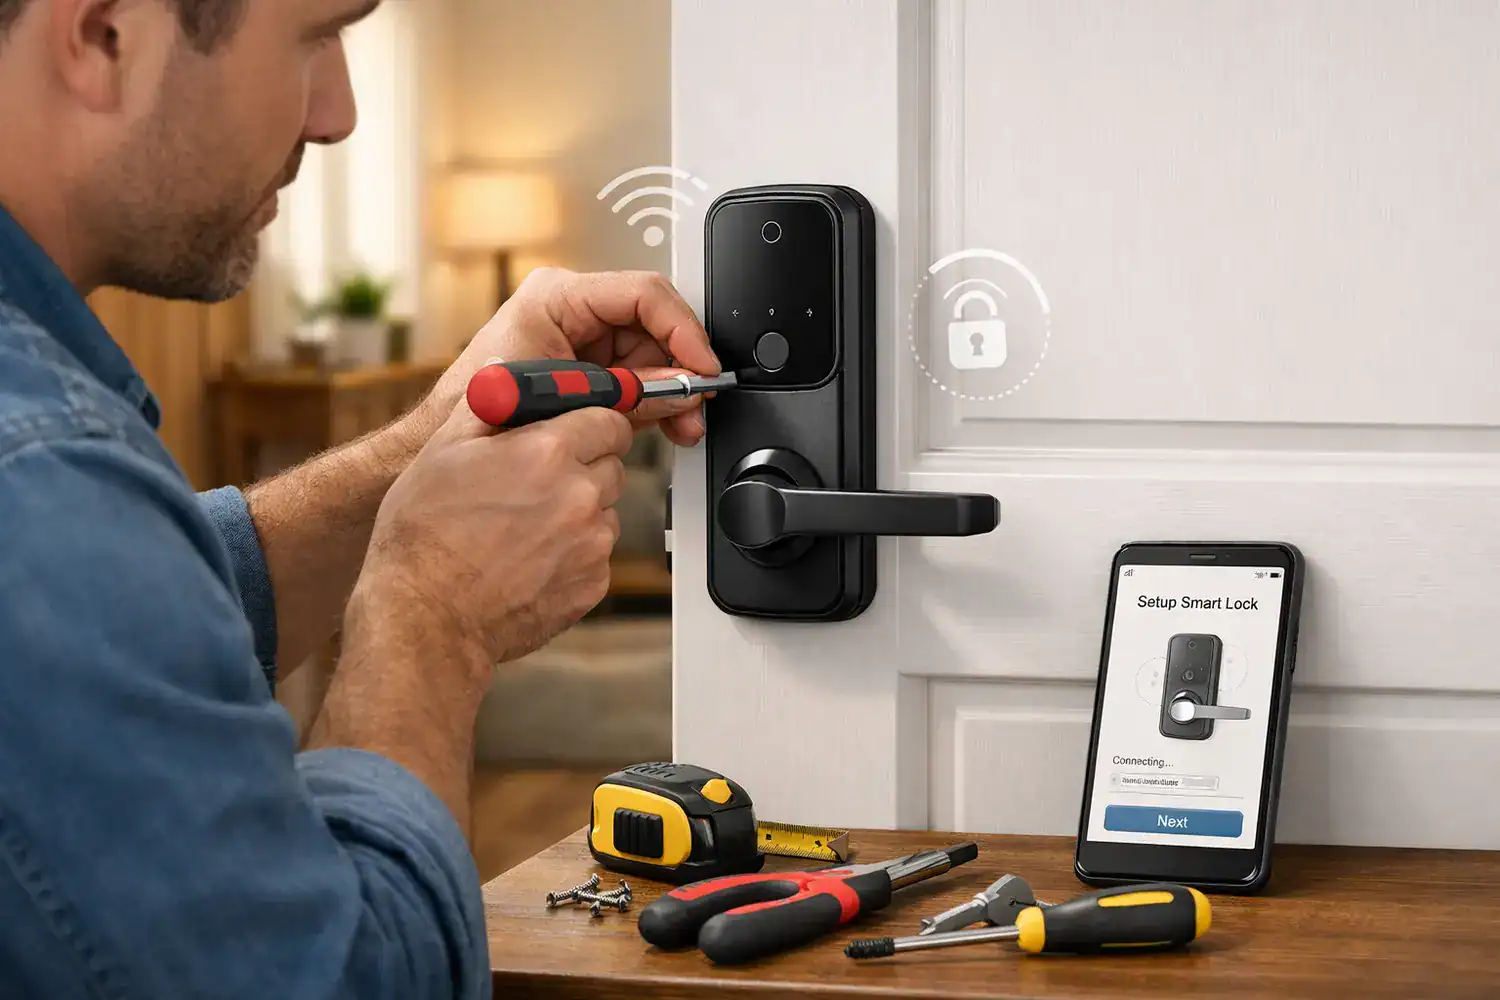
Here’s the short version of how to install a smart door lock: first confirm your door’s thickness, backset, handing, and deadbolt style. Next gather a Phillips screwdriver, tape measure, and fresh batteries. Remove the old lock carefully, install the new latch, mount the exterior assembly, attach the interior motor unit, run the setup calibration, connect the app, and test manual plus electronic operation with the door open. It asks for a tape measure and ten minutes of measuring before you touch a screw.
If your door already closes smoothly and your current deadbolt slides in and out without rubbing, DIY is usually reasonable. If the deadbolt binds, the strike plate is off, or the frame has shifted, installation gets harder fast. In my experience, the locks people call “defective” often just need the door adjusted first. Most “bad locks” I’ve seen were actually bad installs.
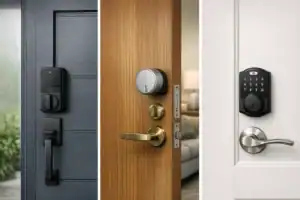
Retrofit models are the easiest entry point because you keep the exterior key cylinder and only replace the inside thumb turn with a motorized unit. Full replacement models offer more features, but they demand better alignment and more patience. If you’re still choosing hardware, this buyer guide on best smart locks for home security can help narrow the field before you start drilling or unscrewing anything.
Why installation quality matters more than most buyers expect
A smart lock is not just a gadget on a door. It is still a deadbolt first. If the bolt doesn’t move freely, the motor works harder, batteries drain faster, and remote commands become unreliable. That’s why proper fit matters as much as features like keypad access, fingerprint unlock, or app control.
Poor alignment can create subtle security gaps too. A bolt that only half-extends because the strike opening is slightly off may still seem “locked” from the app. But mechanically, it is not fully seated. That can lead to false confidence, especially if you rely on auto-lock. I’ve seen this happen on an older entry door where the frame had shifted just enough to make the motor buzz for a second before giving up.
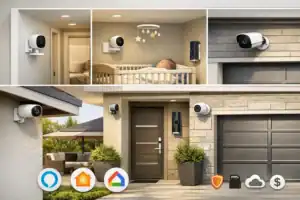
There is also the user experience side. Miscalibration can cause lockouts, inaccurate door handing detection, or jam warnings. If you plan to connect your lock into routines with lights, cameras, or a hub, reliability starts at the door hardware. If you’re building out a broader system, these guides on smart home setup and smart home automation ideas are worth reading after the lock is working mechanically.
The measurements that decide whether your lock will fit
Before buying or opening the box, do a proper smart lock compatibility check. This is the part people rush, and it’s the part that saves the most time.

| Check | Typical Range / Option | Why It Matters |
|---|---|---|
| Door thickness | Usually 1-3/8″ to 2″ | If outside spec, interior assembly may not mount securely. |
| Backset | 2-3/8″ or 2-3/4″ | Wrong backset means the latch sits in the wrong position. |
| Door handing | Left-hand or right-hand swing | Some locks auto-detect; others need manual setup. |
| Deadbolt type | Single-cylinder standard deadbolt | Many smart locks do not support mortise or interconnected sets. |
| Power | AA or CR123 batteries | Battery life depends heavily on friction and wireless use. |
| Install style | Retrofit or full replacement | Retrofit is simpler; replacement offers more hardware options. |
| Tools | Phillips screwdriver, tape measure, level, optional drill | Most installs are screwdriver-only if the door prep is standard. |
Measure from the edge of the door to the center of the bore hole for backset. Measure door thickness through the slab, not trim. If you’re trying to replace deadbolt with smart lock hardware on an older door, check that the latch faceplate and strike plate are not bent or chewed up from years of use. That rough, metallic scrape when the bolt extends is a warning sign.
The full smart door lock installation guide, step by step
Start by opening the door and keeping it open for the whole install. Remove the interior thumb turn assembly and the two long mounting screws from the old deadbolt. Then pull off the exterior cylinder and slide out the latch. Clean the bore holes and check for splinters, paint buildup, or a warped edge that might keep the new latch from sitting flush. That warped edge is the kind of small defect that turns a 20-minute swap into a return trip to the hardware store.
Install the new latch first, making sure the beveled side faces the strike plate if the design requires it. Set the correct backset if the latch is adjustable. Mount the exterior keypad or exterior housing next, feeding any cable through the bore hole carefully. On the inside, connect the cable to the motor unit exactly as the manual shows. Do not pinch wires behind the mounting plate. Tighten screws evenly, alternating side to side. If you crank one side down first, the lock can twist slightly and start binding.
Test the deadbolt movement before mounting the motor unit. I always do this by manually extending and retracting the bolt several times with the door open. If it feels stiff now, electronics will not fix it later. Older or slightly warped doors may require latch realignment or strike plate adjustment before the smart portion behaves properly. This is the moment that decides whether the lock will feel solid or annoy you every day.

Once the interior assembly is on, insert fresh batteries and let the lock power up. Many brands run an automatic handing or bolt calibration routine at this stage. If not, trigger manual calibration in the app or through the programming button sequence. Then move to smart lock app setup after installation: create the account, pair via Bluetooth, add the lock to Wi-Fi or a bridge if needed, and install firmware updates before relying on remote access.
For install keypad door lock models, test keypad code creation right away. For retrofit models, the process is simpler: you usually leave the exterior deadbolt and key cylinder intact, replace only the inside thumb turn, then calibrate the motor to your existing deadbolt travel. That’s why retrofit units are often the least stressful DIY path.
If you want brand-specific instructions, it helps to compare your manual with official setup resources from Lockin, Lockly, and manufacturer support pages such as Schlage support. The steps are similar, but cable routing, handing setup, and bridge pairing can vary by brand.
Small mistakes that turn a one-hour install into a half-day headache
Before installing anything, make sure the door closes and latches smoothly on its own. If you have to push, lift, or pull the door to get the deadbolt aligned, fix that first. Smart locks are less tolerant of friction than human hands. Motor strain leads to battery drain, failed lock attempts, and false jam alerts. The motor doesn’t complain — it just drains the battery and leaves you guessing.
Avoid overtightening. This is one of the most common common smart lock installation problems. Too much pressure can warp the interior and exterior assemblies against the door, causing the tailpiece to bind. Another issue on older doors is stripped screw holes. If the mounting screws won’t hold firmly, use the right repair method before trusting the lock daily.
One mistake I made early on was not checking backset carefully because the old deadbolt looked “normal.” It wasn’t. Not checking backset led to reinstalling the entire lock. That cost me an extra hour and a lot of unnecessary muttering at the front door. Also remember that app setup problems are often connectivity problems, not hardware failures. If remote access matters, consider your network layout as part of the install, not an afterthought.
Which lock and install path actually makes sense for your door
Choosing between retrofit and full replacement comes down to your door, your patience, and whether you rent. Retrofit locks are the go-to for renters and cautious DIYers—they’re usually non-destructive and easy to reverse. Full replacement locks make more sense if you want a keypad outside, a fingerprint reader, or a cleaner all-in-one look. Retrofit asks less of your tools and your confidence.
Smart locks can be less forgiving than traditional locks if alignment isn’t perfect. That is the honest downside. A regular deadbolt may still work with a little resistance because your hand supplies the force. A motorized lock notices every bit of drag. So while full replacement can look better and offer more features, it also asks more from the door prep.
| Option | Best For | Pros | Trade-Offs |
|---|---|---|---|
| Retrofit smart lock | Renters, first-time DIY | Easy install, keeps existing key | Fewer exterior features |
| Full keypad replacement | Owners wanting codes | No key needed, cleaner system | More alignment-sensitive |
| Fingerprint lock | Fast family access | Quick entry, multiple users | Higher cost, more setup |
| Professional install | Metal doors, tricky frames | Less risk, faster troubleshooting | Usually $100–$300 labor |
This is ideal for homeowners with a standard wood door, a smooth existing deadbolt, and basic DIY confidence. You might want to skip this if your frame is clearly misaligned, your door is steel with unusual cutouts, or your lock needs hub-based automation you are not comfortable troubleshooting. For broader security planning, this article on smart home cameras can help if you’re pairing entry monitoring with the lock.
Cost-wise, expect roughly $120 to $350 for the lock itself, plus maybe $10 to $30 for tools or batteries if you do not already own them. Professional installation typically adds $100 to $300, depending on door condition and wiring or bridge setup complexity.
A reliable checklist you can follow from start to finish
For a smooth install, work from a checklist instead of memory. That matters even more if you pause halfway through and come back later. The few minutes it takes to write one save you from backtracking later.
| Stage | What to Check | Done? |
|---|---|---|
| Pre-install | Measure door thickness, backset, handing, bore size, deadbolt type | □ |
| Prep | Gather screwdriver, tape measure, level, fresh batteries, phone app | □ |
| Door condition | Confirm door closes smoothly and deadbolt extends freely | □ |
| Hardware install | Install latch, exterior unit, cable, interior unit, then tighten evenly | □ |
| Power & calibration | Insert batteries, run handing detection or manual calibration | □ |
| App setup | Pair by Bluetooth, add Wi-Fi bridge if needed, update firmware | □ |
| Final testing | Test key, thumb turn, keypad, app unlock, auto-lock, low battery alerts | □ |
My own rule is simple: never close the door until all four access methods you plan to use are verified. That usually means manual thumb turn, physical key if present, keypad code, and phone app. If you are integrating with a hub later, do that after the lock is already stable on its own.
Frequently asked questions before you commit
Can I install a smart lock on a metal or glass door?
Metal doors are possible if the prep matches the lock’s specs, but they are less forgiving and sometimes need professional help. Glass doors usually require specialized hardware and are not a standard DIY deadbolt swap. Always check the manufacturer’s manual before buying.
What if my deadbolt doesn’t align after installation?
Do not force the motor to “wear it in.” Open the door and test the bolt manually. If it works open but not closed, the issue is usually strike plate alignment or door sag. Adjust the strike, deepen the opening if needed, or correct hinge sag before recalibrating.
Do I need a hub or Wi-Fi bridge?
Not always. Many locks use Bluetooth for setup and local control. Remote access often requires built-in Wi-Fi or a separate bridge. If you want automation with other devices, check compatibility with your platform before buying. Manufacturer pages such as Yale Home list model-specific requirements.
What happens if the batteries die, and can renters install one without damage?
Most smart locks warn you well before battery failure, and many still provide a physical key or emergency power contact. Renters should look at retrofit models first because they usually preserve the existing exterior hardware and are easier to remove at move-out.
The safest final call: DIY it, or bring in help?
If your door is standard, your measurements match, and your current deadbolt already moves smoothly, a careful DIY install is absolutely realistic. If your door sticks, your frame is off, or you are dealing with a non-standard opening, hiring a locksmith can be the cheaper decision once you factor in wasted time, stripped screws, and the chance of buying the wrong lock twice. The math flips fast once the frame stops cooperating.
I’d personally DIY a retrofit lock on a well-aligned wood door without hesitation. I’d be much more cautious with a full replacement on an older exterior door that already needs a shoulder push to close. A smart lock should feel boringly reliable once installed. If it feels fussy on day one, something still needs attention.
Take the extra ten minutes to measure, test with the door open, and calibrate properly. That is what separates a lock you trust from one you end up arguing with at the threshold in the rain. The open-door test catches alignment issues the closed door hides.
Ready to choose the right lock and install with confidence?
Start by confirming your measurements, then compare lock styles that match your door and comfort level. If you want help picking hardware before you begin, read the smart lock buyer guide. If you’re expanding beyond the front door, the broader smart home setup guide is a solid next step.
Measure first, install slowly, test everything with the door open, and only then trust the automation. That is still the best advice I know.